Steaming milk on a home espresso machine
A simple guide for home baristas

Follow this simple guide and you’ll be on your way to silky and creamy milk! And, don’t forget: practice makes perfect. Especially when it comes to steaming milk on a home espresso machine, things can get quite frustrating sometimes, so just keep at it and you’re sure to see the results.
I’ve tried to simplify the process for you with these 2 main stages to keep in mind:
Aeration
Whirlpool
Stage 1: Aerate the milk
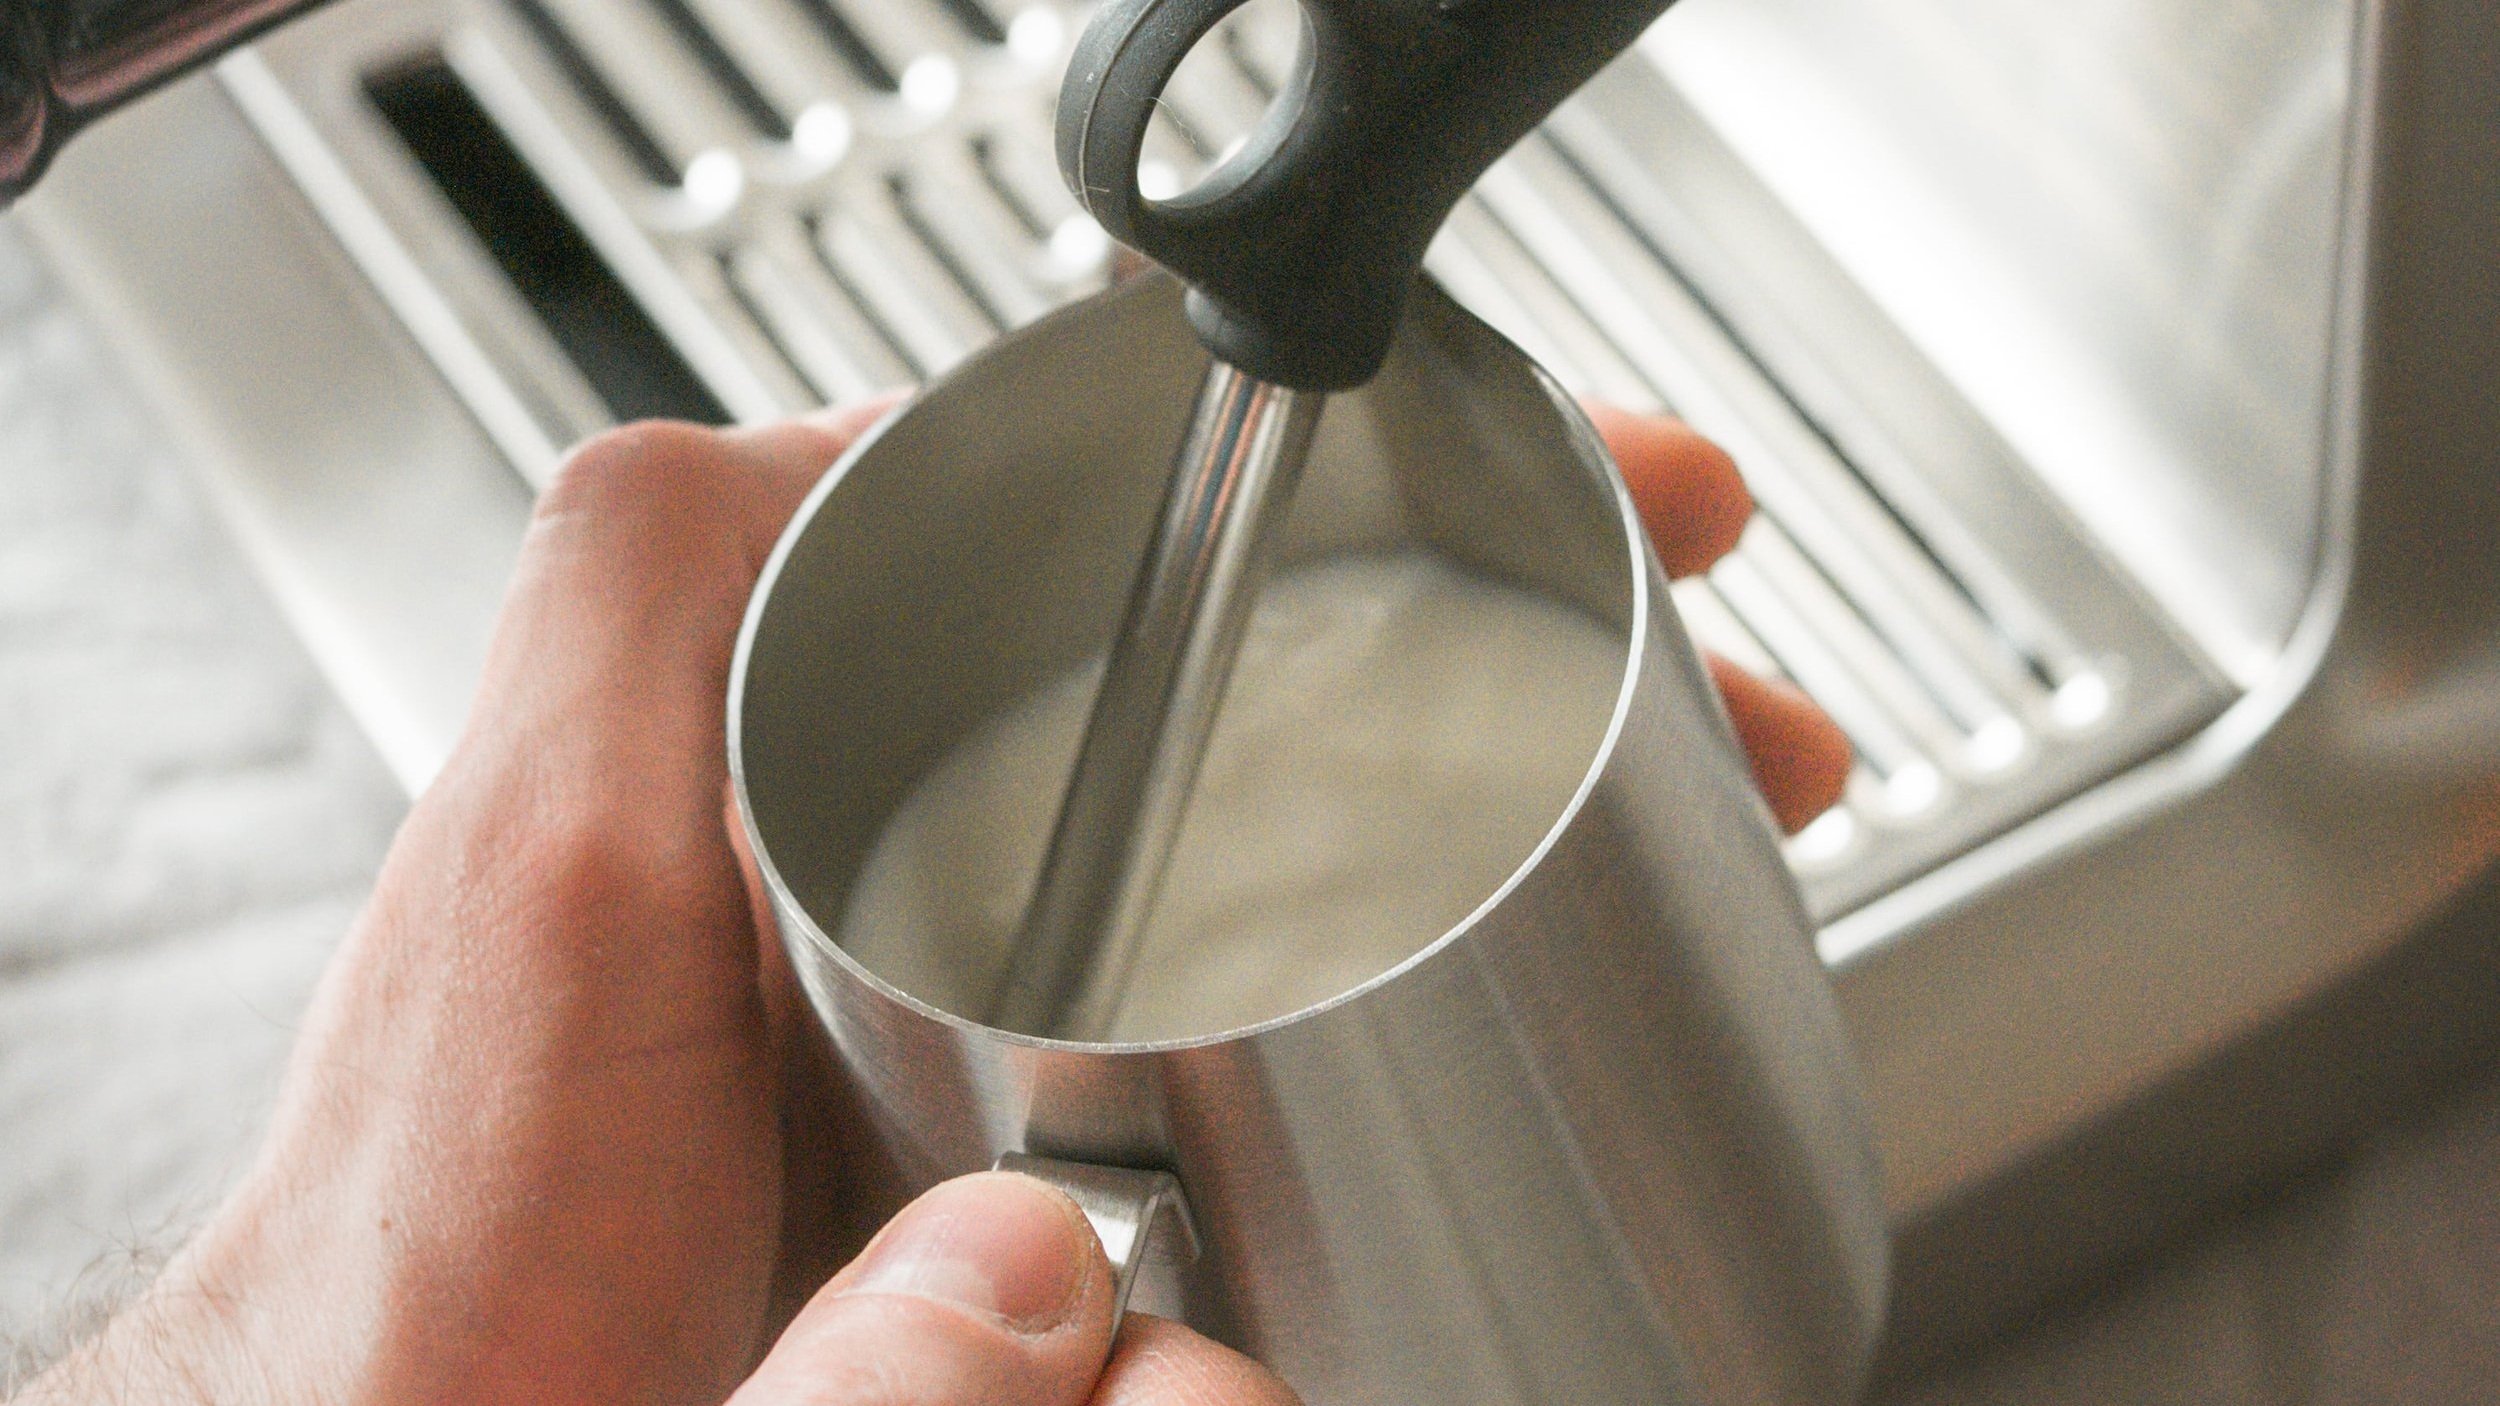
Position the milk pitcher so that the steam wand is gently touching the surface of the milk. I position the steam wand not in the very centre of the milk pitcher, but slightly to the side of it, which helps me to start and maintain a steady whirlpool. Once the milk pitcher is in place, turn on the steam wand and start aerating the milk.
If the steam wand produces a sharp screeching sound, it means the wand is fully submerged and it won’t introduce air into the milk. This is your cue to gradually lower the milk pitcher in order to bring the steam wand closer to the surface of the milk.
If the steam wand is too high above the surface of the milk, it will produce very large bubbles and the turbulence created by the injection of steam will splash the milk all around. In this case you need to slowly raise the milk pitcher so that you bring the steam wand further down into the milk.
Introduce air and adjust the duration based on how much milk you’re steaming (e.g. 300 ml of milk will require less aeration than 600 ml), as well as the type of milk you’re using. For example, steaming oat milk will require a slightly longer aeration.
Too little foam means you haven’t aerated the milk sufficiently. This is how under-aerated milk looks like, challenging to pour latte art with it as you can see:

Too much foam means you aerated the milk for too long. This is how over-aerated milk looks like, also challenging to pour latte art with:
Try to perform the aeration in a gentle way and aim for a smooth “hissing” sound. This will ensure the milk will become silky and creamy, and you’ll achieve a nice microfoam that you can easily and consistently integrate with your espresso.
Not introducing enough air will produce a very thin layer of foam which will prove difficult to turn into a latte art pattern.
Introducing air too aggressively will result in a dry foam which is equally difficult to work with.


Stage 2: Create and maintain a whirlpool
Once the aeration is underway, the milk should start doing a circular movement in the milk pitcher, which in the specialty coffee industry is named “whirlpool” or “vortex”. This is key in order to incorporate everything together (milk and foam) and achieve the ideal milk texture you’re looking for.
After sufficient aeration has been applied, raise the milk pitcher ever so slightly and focus on maintaining a consistent whirlpool until the end of the process. Compared with the aeration, which takes only a few seconds, the whirlpool, once it's kicking off, needs to be maintained continuously until the finish of your routine.
Continue until you reach the desired milk temperature. If you don't work with a thermometer, keep a hand on the milk pitcher and when it becomes too hot to touch, it means you reached the right temperature. Of course, this differs a bit from person to person and it ranges between 60 - 65 degrees Celsius.
Once the milk temperature has been reached:
turn off the steam
clean and purge the wand
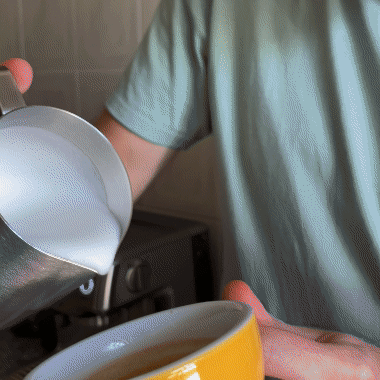
make sure to swirl the milk in the pitcher continuously, in order to avoid milk separation (that’s when the hot milk rests at the bottom and the layer of foam sits on top), then proceed with finalizing your drink.
I hope you find these tips helpful and, if you’d like to dive deeper, you may consider our espresso and latte art home barista workshops. Happy brewing!